This post is the second in a series of lessons on using the Bootstrap web framework to develop a WordPress theme.
In the previous lesson we started to get a feel for what Bootstrap looks like in a web browser and began to think about using Bootstrap code snippets to lay out a website.
In this lesson, we will take the first step toward incorporating Bootstrap into WordPress.
Before Getting Started
The first thing you need is a working instance of WordPress that you can freely play around on without breaking a live website.
There are lots of guides on the web that show you how to run a local installation of WordPress to develop your website and themes. I won’t cover this in detail. My only suggestion is that you check out AMPPS, made by the people who created Softaculous. AMPPS is a free application that lets you run a local webserver with PHP, Apache, and MySQL, sort of like MAMP/XAMPP/WAMP, but with the added functionality of Softaculous built in. This means that setting up WordPress is as simple as running an installation script in your browser. Easy peasy.
The second thing you need is a blank WordPress theme to work with. If you have an existing theme, you can try using that as your base, but I recommend _s (pronounced “underscores”), which is made by the people behind wordpress.com. All you have to do to use _s is enter a theme name on the website, click “Generate,” and then unzip the downloaded archive to your WordPress wp-content/themes directory.
The last thing you will do is make sure that your test site is loading your new theme correctly. In the WordPress Dashboard, select your theme in Appearance > Themes. If you visit your site now, it should look totally barren, but this will soon change.
Bootstrap Your New Theme
The next step is to add Bootstrap to your new blank WordPress theme. There are several ways to do this, but the easiest is to download the ready-to-use Bootstrap package from getbootstrap.com.
After you unzip the package, you should have a folder called “dist”. Move the “dist” folder into your new theme’s folder, and optionally, rename the folder something like “bootstrap” to make it easier to remember what’s in it.

Move the _s generated folder to your WordPress themes folder and optionally rename it “bootstrap”
Next we need to modify your theme’s “functions.php” file to get WordPress to load the Bootstrap files when someone views your site. To do this, open the “functions.php” file in your favorite text editor. Scroll down to around line 77, where there should be a line something like this (except where your theme name appears instead of “my_bootstrap_theme”):
function my_bootstrap_theme_scripts() {
Below this line are a few function calls to include the default CSS and Javascript files that come with the _s template. We are going to add a few more lines of code below these to include Bootstrap’s CSS and Javascript files. So around line 83, add the following:
wp_register_script( 'bootstrap-js', get_template_directory_uri() . '/bootstrap/js/bootstrap.min.js', array( 'jquery' ), '3.0.1', true );

wp_register_style( 'bootstrap-css', get_template_directory_uri() . '/bootstrap/css/bootstrap.min.css', array(), '3.0.1', 'all' );

wp_enqueue_script( 'bootstrap-js' );

wp_enqueue_style( 'bootstrap-css' );
Your functions.php should look something like this:
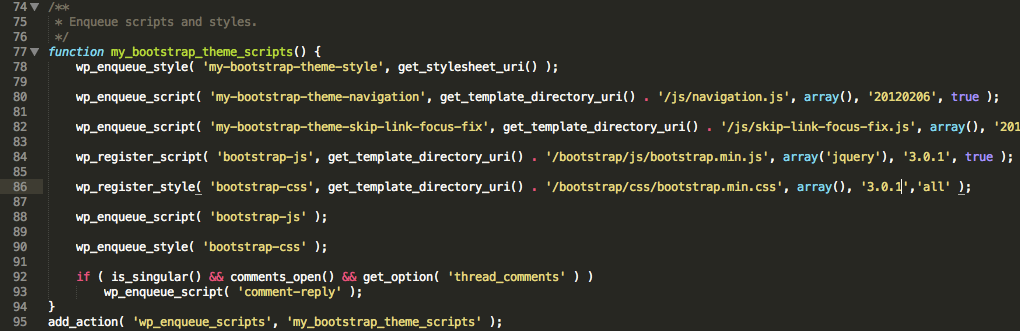
The edited functions.php file
This first line tells WordPress to register a new script, which we are going to call “bootstrap-js”. It also tells WordPress where to look for the script file (in this case, in the theme folder [get_template_directory_uri()], and then inside the bootstrap folder’s “js” folder, there is a file called “bootstrap.min.js”. The last three parameters tell WordPress that this script depends on the jquery javascript library, that the version of the script that we’re loading is version 3.0.1 (which helps it with caching), and that the script should be added in the footer of the page, which helps to speed up the page loading in a browser.
The second line is almost the same as the first, except it’s loading the Bootstrap CSS file and telling WordPress that this stylesheet should be used for ‘all’ media types (print, screen, etc.).
The last two lines tell WordPress to actually include the scripts on the page (whereas before they were only “registered”, but not loaded). We could have done this slightly differently by skipping the “wp_register_script” calls altogether, but this way is slightly better practice in case we later decide that we only want to load Bootstrap sometimes.
Before we save and close the functions.php file, we’re going to add one more line of code. Below the “add_action(…” which should now be around line 99, add the following:
remove_filter('the_content', 'wpautop');
This line will prevent WordPress from automatically inserting HTML line breaks in your posts. If you don’t do this, some of the Bootstrap snippets that we are going to add will probably not display correctly.
Finally, save the functions.php file. Your theme is now ready to use Bootstrap*!
*As a side note, if/when you start adding additional CSS, for example, from one of the startbootstrap.com templates, you can either add it to a new CSS file or append it to the style.css file that comes with the theme template. If you choose the former, simply add an additional set of ‘wp_register_style()’ and ‘wp_enqueue_style()’ calls to your new CSS file. In my case, I created a new file, “mytheme.css” and included it with the code:
wp_register_style( 'mytheme-css', get_template_directory_uri() . '/mytheme.css', array(), '0.0.1','all' );

wp_enqueue_style( 'mytheme-css' );
Test Your Bootstrapped Theme
Now that you have a theme that includes Bootstrap’s base files, you can very easily test it out by creating a page that includes Bootstrap components.
On your test WordPress site, create a new post or edit the default “Sample Post”. In the content area, click the “text” tab to edit the raw HTML for your page’s content.
Now go to http://bootsnipp.com/snippets/featured/crowdfunding-grid-bs-3 and click on the “HTML” button. Copy the code and paste it into a new WordPress post on your test site.
Hit “Publish” and then view the post.
If everything went as planned, your post should look something like this:
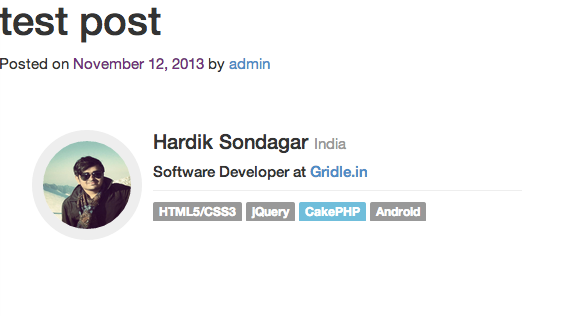
Your test post should look something like this!
Congratulations! You now have a working custom WordPress theme that implements the Bootstrap framework.
Next Steps
Now that you’ve included Bootstrap in your WordPress theme, you can do a number of things.
As a next step, you can play around with Bootstrap by adding new pages or posts containing snippets from bootsnipp.com or entire templates from startbootstrap.com. If you do the latter, be sure that you add any additional CSS to your custom CSS files or create new CSS files and include them like we did previously. Also, when using templates from startbootstrap.com, you should only include the content between the and tags since the code before that it is already being added by WordPress.
If you are feeling ambitious, you can start editing the theme’s template files such as header.php, footer.php, index.php, and content.php to incorporate Bootstrap components into your theme. One of the subsequent lessons will cover further integration of Bootstrap into your WordPress theme, but it doesn’t hurt to start playing with the theme files now.


